[st-kaiwa-34]
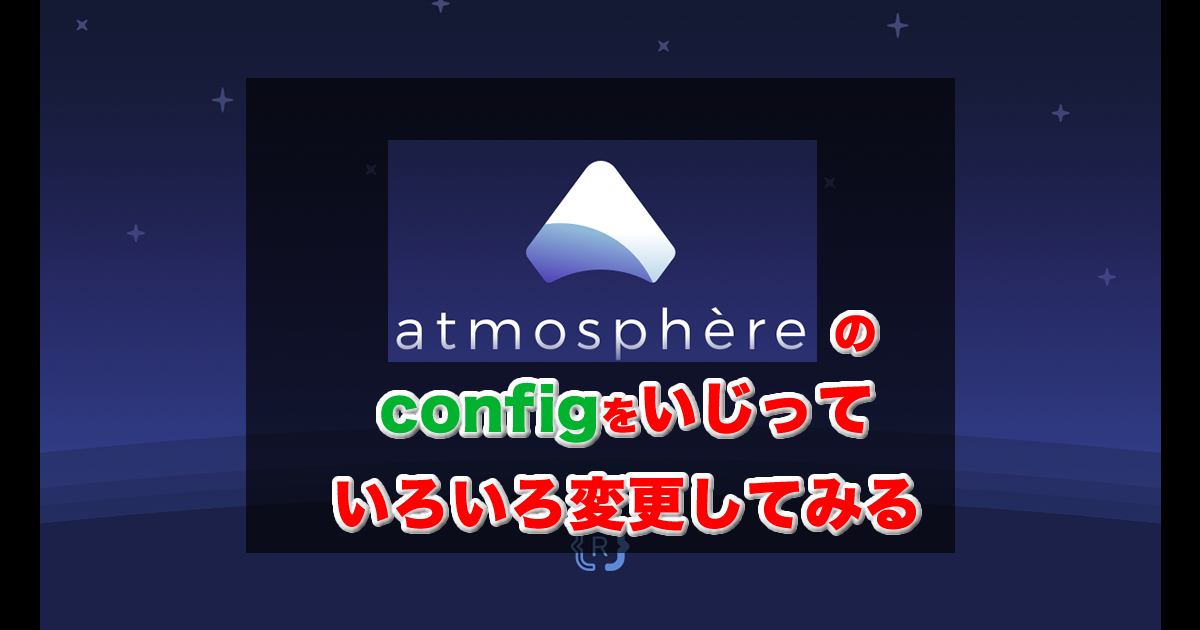
Atmosphereの設定を変更するもぐ
[/st-kaiwa-34]
この世界すべては自己責任です。
本体が壊れようが、データが消えようが、BANされようが。です。それが怖いなら改造しない。ってどこでも言われてるでしょ?
このブログは対象の機材を持っている読んでわかる人向けです。
あったら便利なものだけ紹介しときます。


はじめに
普段、使用しているAtmosphereですが実はいろんな設定あります。大体はincognitoとかチート無効とかしか使ってないけどせっかくなので、どんなことが出来るか見てみましょう。
Atmosphere1.2.5をベースに書いています。
ファイルの配置場所
「Atmosphere」フォルダの中に「config_templates」というファイルがあり、中には4つのiniファイルが入っています。細かい説明はあとにしますが、この4つのファイルをそれぞれこれを所定のフォルダにコピーして使います。
| ファイル | 配置場所 |
|---|---|
| system_settings.ini | Atmosphere>config |
| stratosphere.ini | Atmosphere>config |
| override_config.ini | Atmosphere>config |
| exosphere.ini | SDカードのルートディレクトリ |
system_settings.ini
「Atmosphere>config_templates」 から「Atmosphere>config」にコピーしてメモ帳などで編集をします。
[eupld] エラーレポートを任天堂に送信を止める
BANの原因ともいわれていて、任天堂に送信しているエラーレポートを止めます。
これはデフォルトで送信を止めない状態。
[eupld]
; Disable uploading error reports to Nintendo
; upload_enabled = u8!0x0
エラーレポートの送信を止めるには、以下のように書き換えます。
[eupld]
; Disable uploading error reports to Nintendo
upload_enabled = u8!0x0
[usb] USB3.0の有効化
SwitchのUSBポートはUSB3.0で造られていますが、なぜかUSB2.0に制限がかかっています。これを無理やりUSB3.0を有効化します。
USB3.0有効化した際の注意点や効果はこの記事を参考にしてください
[st-card myclass=”” id=”1885″ label=”” pc_height=”” name=”” bgcolor=”” color=”” webicon=”” readmore=”on” thumbnail=”on” type=””]
それでも「有効化するぜ!という方は、
デフォルトではUSB3.0が無効なので
[usb]
; Enable USB 3.0 superspeed for homebrew
; 0 = USB 3.0 support is system default (usually disabled), 1 = USB 3.0 support is enabled.
; usb30_force_enabled = u8!0x0
これを以下のように書き換えます。
[usb]
; Enable USB 3.0 superspeed for homebrew
; 0 = USB 3.0 support is system default (usually disabled), 1 = USB 3.0 support is enabled.
usb30_force_enabled = u8!0x1
[ro] NROファイルの検証
これはよくわかりませんでした。普通は使わない項目でミュージックハックする際に変更をするようです。NROファイルの検証をしない設定。
これがデフォルト
[ro]
; Control whether RO should ease its validation of NROs.
; (note: this is normally not necessary, and ips patches can be used.)
; ease_nro_restriction = u8!0x1
ミュージックハックする際などは、以下のように変更
[ro]
; Control whether RO should ease its validation of NROs.
; (note: this is normally not necessary, and ips patches can be used.)
ease_nro_restriction = u8!0x1
[lm] ログの保存設定
ログを保存するかどうか設定できます。デフォルトでは無効化されています。
[lm]
; Control whether lm should log to the SD card.
; Note that this setting does nothing when log manager is not enabled.
; enable_sd_card_logging = u8!0x1
; Control the output directory for SD card logs.
; Note that this setting does nothing when log manager is not enabled/sd card logging is not enabled.
; sd_card_log_output_directory = str!atmosphere/binlogs
; Atmosphere custom settings
有効化するとともに、保存場所の設定をします。標準でログの保存先は、「Atmosphere>binlogs」になっています。
[lm]
; Control whether lm should log to the SD card.
; Note that this setting does nothing when log manager is not enabled.
enable_sd_card_logging = u8!0x1
; Control the output directory for SD card logs.
; Note that this setting does nothing when log manager is not enabled/sd card logging is not enabled.
sd_card_log_output_directory = str!atmosphere/binlogs
; Atmosphere custom settings
あとで説明する、ログマネージャーを有効にしないとログ保存されません。
エラー発生時に自動的に再起動
パニックエラーなどが発生した際に、自動的に再起動するように設定ができます。デフォルトでは再起動しない設定になっています。
; Reboot from fatal automatically after some number of milliseconds.
; If field is not present or 0, fatal will wait indefinitely for user input.
; fatal_auto_reboot_interval = u64!0x0
自動的に再起動させる場合は、以下のように書き換えます。
; Reboot from fatal automatically after some number of milliseconds.
; If field is not present or 0, fatal will wait indefinitely for user input.
fatal_auto_reboot_interval = u64!0x1
再起動の動作を変更
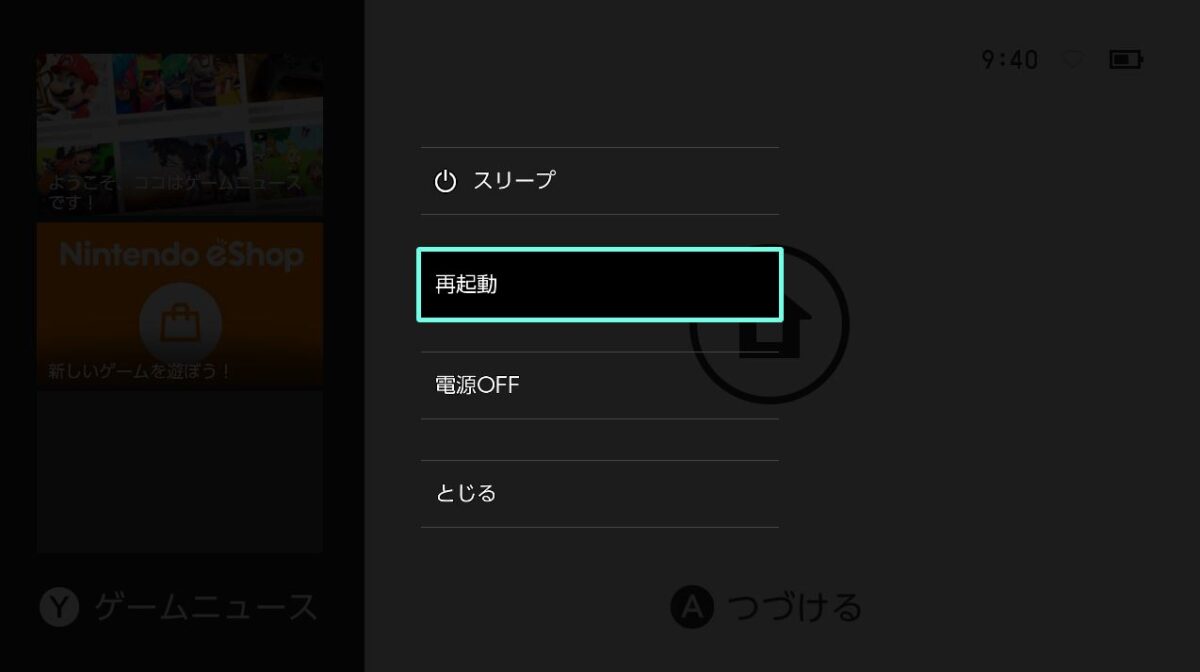
パワーボタンを押して電源オプションから「再起動」を押したときの動作を変更します。
デフォルトでは、「Atmosphere」フォルダにある reboot_payload.bin が設定されています。これは今回起動時に読み込ませたペイロードで、再起動してきます。
; Make the power menu’s “reboot” button reboot to payload.
; Set to “normal” for normal reboot, “rcm” for rcm reboot.
; power_menu_reboot_function = str!payload
これを、自動的にペイロードさせずRCMモードで起動し、ペイロードファイル送信待ちにするなら
; Make the power menu’s “reboot” button reboot to payload.
; Set to “normal” for normal reboot, “rcm” for rcm reboot.
power_menu_reboot_function = str!rcm
または、再起動したらOFWで起動させたいんだ!という場合は
; Make the power menu’s “reboot” button reboot to payload.
; Set to “normal” for normal reboot, “rcm” for rcm reboot.
power_menu_reboot_function = str!normal
に書き換えます。
起動時 全チート有効化、無効化
これが厄介で、Atmosphereはデフォルトだと全チートを有効化して立ち上がってきます。
; Controls whether dmnt cheats should be toggled on or off by
; default. 1 = toggled on by default, 0 = toggled off by default.
; dmnt_cheats_enabled_by_default = u8!0x1
これをゲーム起動時はチートを無効化します。
; Controls whether dmnt cheats should be toggled on or off by
; default. 1 = toggled on by default, 0 = toggled off by default.
dmnt_cheats_enabled_by_default = u8!0x0
チートの有効・無効を個別保存
先ほどの項目では全部の項目を有効にするか無効にするかでしたが、これは各チート項目を有効・無効に切り替えた際にその状態を保存してくれます。
デフォルトではチート項目の状態保存をしてくれません。
; Controls whether dmnt should always save cheat toggle state
; for restoration on new game launch. 1 = always save toggles,
; 0 = only save toggles if toggle file exists.
; dmnt_always_save_cheat_toggles = u8!0x0
これを、有効・無効を保存する場合には以下のように書き換えます。これでチートの有効・無効を切り替え時に、状態保存のファイルが作成されます。
; Controls whether dmnt should always save cheat toggle state
; for restoration on new game launch. 1 = always save toggles,
; 0 = only save toggles if toggle file exists.
dmnt_always_save_cheat_toggles = u8!0x1
一番最後を0にした場合、過去 1 に設定して、そのゲームのチート状態保存ファイルがある場合は、状態保存してくれます。
; Controls whether dmnt should always save cheat toggle state
; for restoration on new game launch. 1 = always save toggles,
; 0 = only save toggles if toggle file exists.
dmnt_always_save_cheat_toggles = u8!0x0
HBLのBISパーティションへの書き込み有効化
これは、使用しな方がいいと作者が言っているので説明は割愛します。よくわからないし。
; Enable writing to BIS partitions for HBL.
; This is probably undesirable for normal usage.
; enable_hbl_bis_write = u8!0x0
HBLのCAL0パーティションの読み取りを有効化
これは、使用しな方がいいと作者が言っているので説明は割愛します。よくわからないし。
; Enable reading the CAL0 partition for HBL.
; This is probably undesirable for normal usage.
; enable_hbl_cal_read = u8!0x0
fs.mitmによる保存ファイルのリダイレクト設定
ベースRomFSイメージを解析し、romfs.binとromfsフォルダ内のファイルを1つのRomFSイメージとしてマージし、その保存ファイルをSDカードにリダイレクト?まだ実験段階らしいです。
; Controls whether fs.mitm should redirect save files
; to directories on the sd card.
; 0 = Do not redirect, 1 = Redirect.
; NOTE: EXPERIMENTAL
; If you do not know what you are doing, do not touch this yet.
; fsmitm_redirect_saves_to_sd = u8!0x0
「わからないなら触れるな」とのことですが、SDカードにリダイレクトさせるなら以下のように書き換えます。
; Controls whether fs.mitm should redirect save files
; to directories on the sd card.
; 0 = Do not redirect, 1 = Redirect.
; NOTE: EXPERIMENTAL
; If you do not know what you are doing, do not touch this yet.
fsmitm_redirect_saves_to_sd = u8!0x1
デバッグモードフラグの表示
これはよくわかりませんでした。有効にするとシステム設定のどこかにデバッグモードのフラグが表示される?どこにも見当たりませんでした。
基本変更することはないと思いますが
; Controls whether am sees system settings “DebugModeFlag” as
; enabled or disabled.
; 0 = Disabled (not debug mode), 1 = Enabled (debug mode)
; enable_am_debug_mode = u8!0x0
有効化する場合は、以下のように書き換えます。
; Controls whether am sees system settings “DebugModeFlag” as
; enabled or disabled.
; 0 = Disabled (not debug mode), 1 = Enabled (debug mode)
enable_am_debug_mode = u8!0x1
任天堂サーバーへの接続をブロック①
DNSを強制変更し任天堂へのサーバーへの接続をブロックします。デフォルトでは無効なので
; Controls whether dns.mitm is enabled
; 0 = Disabled, 1 = Enabled
; enable_dns_mitm = u8!0x1
これを有効にして、接続をブロックするには以下のように書き換えます。
; Controls whether dns.mitm is enabled
; 0 = Disabled, 1 = Enabled
enable_dns_mitm = u8!0x1
任天堂サーバーへの接続をブロック②
前項目の「任天堂サーバーへの接続をブロック①」に加え、ユーザーがDNS設定している場合にさらにリダイレクトして2段階でブロックする。
DNSを変更していると、そのDNS(IP)の先はどこかのサーバーだったりします。そのサーバーがダウンしてた際は任天堂へ通信しちゃったりすることがあるので2段階にする設定です。
デフォルトでは無効なので
; Controls whether dns.mitm uses the default redirections in addition to
; whatever is specified in the user’s hosts file.
; 0 = Disabled (use hosts file contents), 1 = Enabled (use defaults and hosts file contents)
; add_defaults_to_dns_hosts = u8!0x1
有効にする場合は、以下のように書き換えます。90DNSなどを設定していないと意味がないです。
; Controls whether dns.mitm uses the default redirections in addition to
; whatever is specified in the user’s hosts file.
; 0 = Disabled (use hosts file contents), 1 = Enabled (use defaults and hosts file contents)
add_defaults_to_dns_hosts = u8!0x1
dns.mitmのログを保存するか
確認のために、DNSを変更したログを保存して確認したい場合は有効にします。デフォルトは保存されないので
; Controls whether dns.mitm logs to the sd card for debugging
; 0 = Disabled, 1 = Enabled
; enable_dns_mitm_debug_log = u8!0x0
保存したい場合は、以下のように書き換えます。
; Controls whether dns.mitm logs to the sd card for debugging
; 0 = Disabled, 1 = Enabled
enable_dns_mitm_debug_log = u8!0x1
HTCの有効/無効
「HTC」が何なのかわかりませんでした・・・
; Controls whether htc is enabled
; 0 = Disabled, 1 = Enabled
; enable_htc = u8!0x0
有効化するには、以下のように書き換えます。
; Controls whether htc is enabled
; 0 = Disabled, 1 = Enabled
enable_htc = u8!0x1
HTCを有効にすると、ログマネージャーの設定にかかわらず、強制的にログマネージャーが有効になります。
ログマネージャーの有効化
Atmosphereのログ保存を有効にするか設定できます。デフォルトでは無効です。
; Controls whether atmosphere’s log manager is enabled
; Note that this setting is ignored (and treated as 1) when htc is enabled.
; 0 = Disabled, 1 = Enabled
; enable_log_manager = u8!0x0
有効にする場合は、以下のように書き換えます。
; Controls whether atmosphere’s log manager is enabled
; Note that this setting is ignored (and treated as 1) when htc is enabled.
; 0 = Disabled, 1 = Enabled
enable_log_manager = u8!0x1
前項目の「HTC」を有効にするとこの項目が無効になっていても、強制的にログ保存は有効になります。
アプレットモードのHEAP領域の設定①
デフォルトではアプレットモードで自作アプリを起動した際に使用可能なメモリをすべてHEAPとして使用されます。よくわかりませんので変更しない方がよさそう。
; Controls the size of the homebrew heap when running as applet.
; If set to zero, all available applet memory is used as heap.
; The default is zero.
; applet_heap_size = u64!0x0
アプレットモードのHEAP領域の設定②
他のアプレットで使用するため実行するときに予約するメモリの量を制御します。これもよくわかりません。
; Controls the amount of memory to reserve when running as applet
; for usage by other applets. This setting has no effect if
; applet_heap_size is non-zero. The default is 0x8600000.
; applet_heap_reservation_size = u64!0x8600000
「 アプレットモードのHEAP領域の設定①」が 0 の場合は設定を変更しても効果はありません。
stratosphere.ini
「Atmosphere>config_templates」 から「Atmosphere>config」にコピーしてメモ帳などで編集をします。
NoGCの設定
ゲームカードリッジの読み込みを有効にするかしないかです。詳しくは以下の記事を参照してください。HEKATEユーザーは別途設定があります。
[st-card myclass=”” id=”742″ label=”” pc_height=”” name=”” bgcolor=”” color=”” webicon=”” readmore=”on” thumbnail=”on” type=””]
デフォルトではゲームカートリッジが読み込みできないので
[stratosphere]
; To force-enable nogc, add nogc = 1
; To force-disable nogc, add nogc = 0
ゲームカートリッジから吸い出しをしたい場合は、以下のように書き換えます。
[stratosphere]
; To force-enable nogc, add nogc = 1
; To force-disable nogc, add nogc = 0
nogc = 0
override_config.ini
「Atmosphere>config_templates」 から「Atmosphere>config」にコピーしてメモ帳などで編集をします。
プログラム固有の設定
最大8つのプログラム固有の構成を設定できるとのことですが、よくわからなかったです。多分、相当使わない。
[hbl_config]
; Program Specific Config
; Up to 8 program-specific configurations can be set.
; These use program_id_#, override_address_space_#, and override_key_#
; where # is in range [0,7].
; program_id_0=010000000000100D
; override_address_space=39_bit
; override_key_0=!R
hbmを起動するボタンの変更
デフォルトではRボタン押しながらゲームを起動することで通常モードのhbmを起動できますが、このRボタンを変更します。この時、override_any_app=trueの行も書き替えることを忘れないでください。
; Any Application Config
; Note that this will only apply to program IDs that
; are both applications and not specified above
; by a program specific config.
; override_any_app=true
; override_any_app_key=R
; override_any_app_address_space=39_bit
; path=atmosphere/hbl.nsp
例えば、Lボタン押しながらゲーム起動でhbmを起動したいなら、以下のように書き換えます。Lボタンに変更したら、アルバム起動のボタン変更も忘れないように設定変更しましょう。
; Any Application Config
; Note that this will only apply to program IDs that
; are both applications and not specified above
; by a program specific config.
override_any_app=true
override_any_app_key=L
; override_any_app_address_space=39_bit
; path=atmosphere/hbl.nsp
例えば、Bボタン押しながらであれば
; Any Application Config
; Note that this will only apply to program IDs that
; are both applications and not specified above
; by a program specific config.
override_any_app=true
override_any_app_key=B
; override_any_app_address_space=39_bit
; path=atmosphere/hbl.nsp
その他ボタンの記述は以下の通りです。十字キーとスティックは使わないと思うので割愛します。
override_any_app_key=A
override_any_app_key=X
override_any_app_key=Y
override_any_app_key=ZL
override_any_app_key=ZR
override_any_app_key=SL
override_any_app_key=SR
+(プラス)ボタン
override_any_app_key=Plus
-(マイナス)ボタン
override_any_app_key=Minus
アルバムを開く設定
デフォルトでアルバムを開くとアプレットモードのhbmが起動、Lボタンを押しながらアルバムを開くと、本来のアルバムが起動します。
[default_config]
; override_key=!L
; cheat_enable_key=!L
これをLボタン押しながらではなく、Yボタン押しながらに変更する場合は以下のように書き換えます。
[default_config]
override_key=!Y
; cheat_enable_key=!L
hbm起動のボタン設定と重複しないように設定しましょう。
その他のボタン設定例です。
override_key=A
override_key=X
override_key=B
override_key=R
override_key=L
override_key=ZL
override_key=ZR
override_key=SL
override_key=SR
+(プラス)ボタン
override_key=Plus
-(マイナス)ボタン
override_key=Minus
ゲーム起動時チートをON
Edizonなどチートを導入している必要がありますが、これはゲーム起動時にチートを有効にして立ち上げる設定?
[default_config]
; override_key=!L
; cheat_enable_key=!L
今度は、指定したボタンを押しながらゲーム起動することでチートを有効にして立ち上げる設定です。イマイチ必要性を感じませんが。
Lボタン押しながらゲーム起動でチートを有効化したい場合は以下のように書き換えます。これはアルバム起動ボタンと重複しても問題ありません。
[default_config]
; override_key=!L
cheat_enable_key=!L
その他ボタン設定は、hbmやアルバム起動と同じです。
exosphere.ini
「Atmosphere>config_templates」 から「Atmosphere」にコピーしてメモ帳などで編集をします。
デバッグモード
これはデフォルトで 1 です。0にすると不具合が出るようなので変更しない。
debugmode=1
ユーザーランドのデバッグモード
実行中のSwitchのOS(システム)で中核以外でユーザー権限で操作ができる領域、主にアプリケーションの部分。のデバッグモードを有効にするかどうか。何が出来るか不明。
デフォルトでは0
debugmode_user=0
有効にするなら
debugmode_user=1
ハンドラの呼び出し
例外エラーが発生した時に、ハンドラを呼び出すかどうか。デフォルトの0から変更した場合はAtmosphereの動作に異常が発生するかもしれないし、サポート対象外となる。
基本は0のまま変更しない。
disable_user_exception_handlers=0
PMUレジスタへのアクセス制御
一般ユーザ権限で、PMU(パフォーマンス監視ユニット)レジスタにアクセスできるようにするかどうか。デフォルトは0。変更した際、どんな影響が出るか不明とのこと。
enable_user_pmu_access=0
本体固有番号の隠蔽(incognito)
本体の固有番号をダミー番号に差し替えてBANのリスクを減らす。詳しくは下記の記事を参照。
[st-card myclass=”” id=”449″ label=”” pc_height=”” name=”” bgcolor=”” color=”” webicon=”” readmore=”on” thumbnail=”on” type=””]
デフォルトは無効になっているので、これはsynand、emunandともに変更推奨
blank_prodinfo_sysmmc=0
blank_prodinfo_emummc=0
本体固有情報をダミーにするには以下のように書き換える。
blank_prodinfo_sysmmc=1
blank_prodinfo_emummc=1
PRODINFOの書き込み
PRODINFOをsysnandに書き込むかどうか?よくわかりませんでしたが設定を1に書き換えている人もいるようです。
allow_writing_to_cal_sysmmc=0
ログ用ポートの設定
データ通信プロトコルのポート設定。デフォルトは0 変更する必要はなさそう。
log_port=0
0 = UART-A
1 = UART-B
2 = UART-C
3 = UART-D
ログのデータ転送速度設定
ログのデータ転送速度の設定。標準は、115200ボー。変更の必要はなさそう。
log_baud_rate=115200
UARTポートを反転制御
UARTポートを反転させるかどうか。デフォルトは0。変更しない方がよさそう。
log_inverted=0